I’ve been pretty interested in mechanical keyboards lately. Building one has been on my bucket list for awhile now so last weekend I decided to check out Yusha Kobo , a specialty keyboard store based in Tokyo which sells kits.
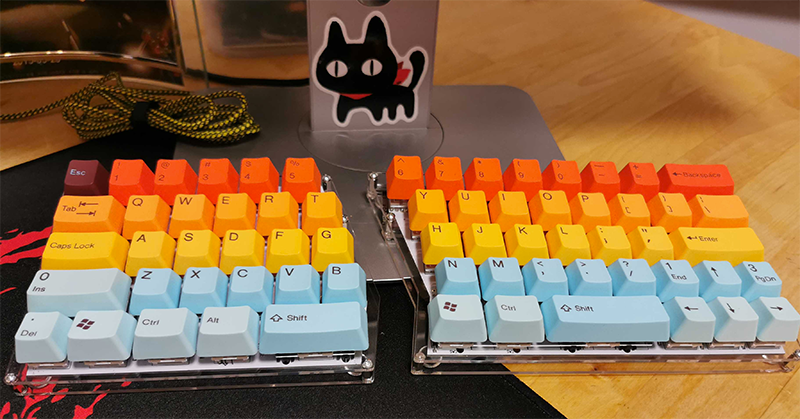
I purchased my first build kit the Mint60 which a split keyboard. The 60 standing for the 60% keyboard layout which is a popular form factor for hobby keyboards.
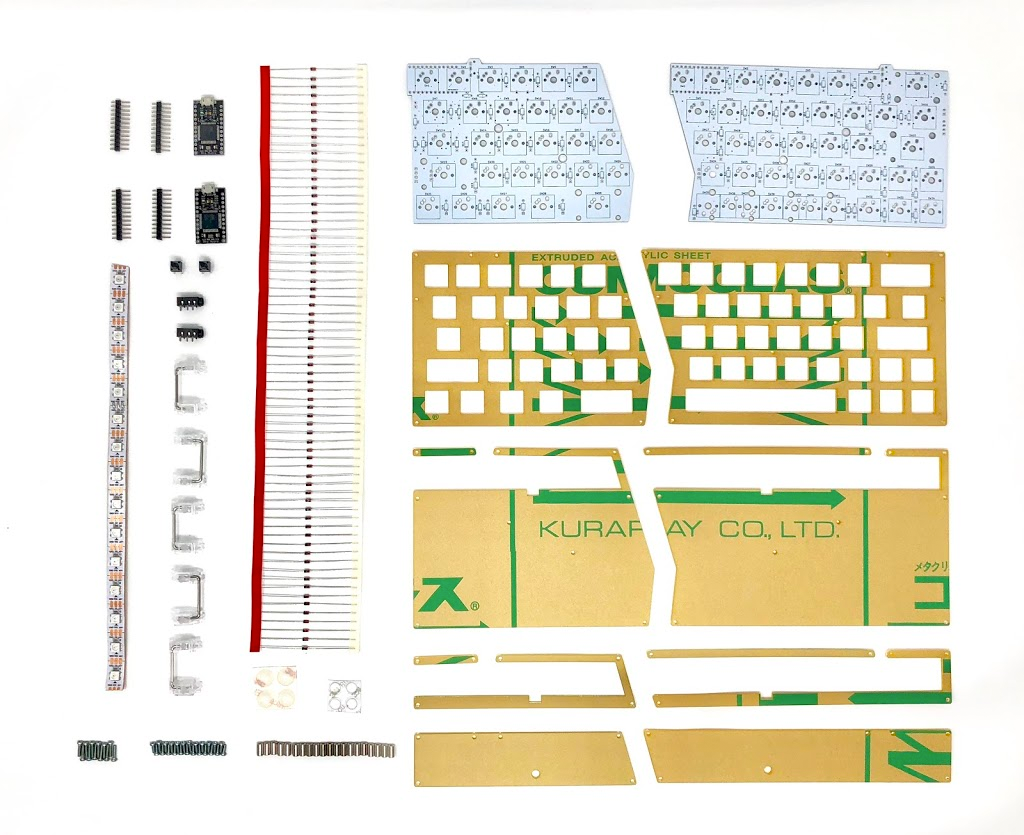
My Mint60 build kit comes with the following:
- A transparent keyboard casing
- Screws (spacer x20, 5mm x 28, 8mm x 12)
- CherryPCB Stablisers x5
- ProMicro Arduino x2
- TRRS Audio Jack x2
- RGB LED Strip
- Reset Switch x2
- And a lot of resistors
 (Image credit Yusha Kobo)
Note, build kits sold at Yusha Kobo (and most online stores) don’t include key switches or key caps. These have to be purchased seperately with your kit. The Mint60 has 66 keys so I needed to purchase 66 switches and the key caps seperately.
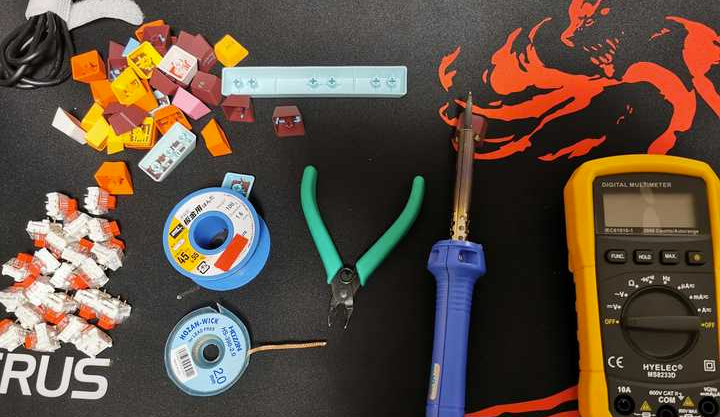
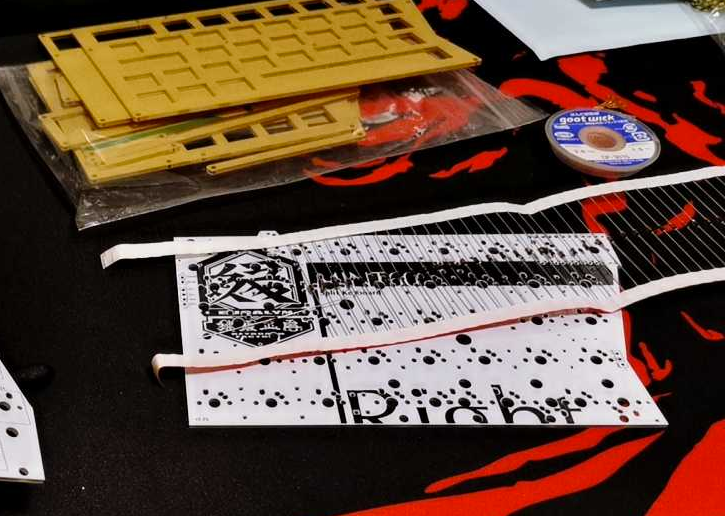
What do I need to put a kit together?
- A keyboard starter kit (includes a pcb, mirocontroller, keyboard stablizers, case, etc.)
- Your own keyboard switches and caps (If not included in your kit)
- Soldering gear (solder, soldering iron, copper wick)
- A pair for small wire cutters
- A multi-meter for debugging (optional)
- A lot of patience
Note, you probably won’t need a multi-meter but it may help if you made mistakes soldering. I ended up using a multi-meter to test my switches and some components for continuity .
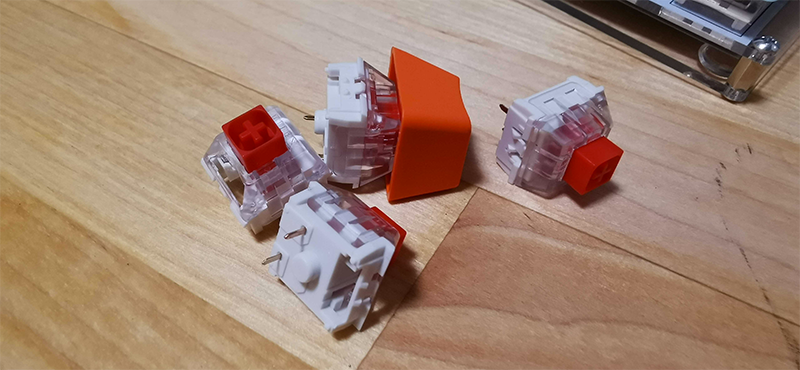
Key switches
One of the most rewarding parts of building your own keyboard is selecting your own key switches. Here’s a great YouTube video for finding the right switch for you.
In the end I chose Cherry MX red switches (80 for around 3000 JPY) at Yusha Kobo. These are soft to press and don’t make much noise.
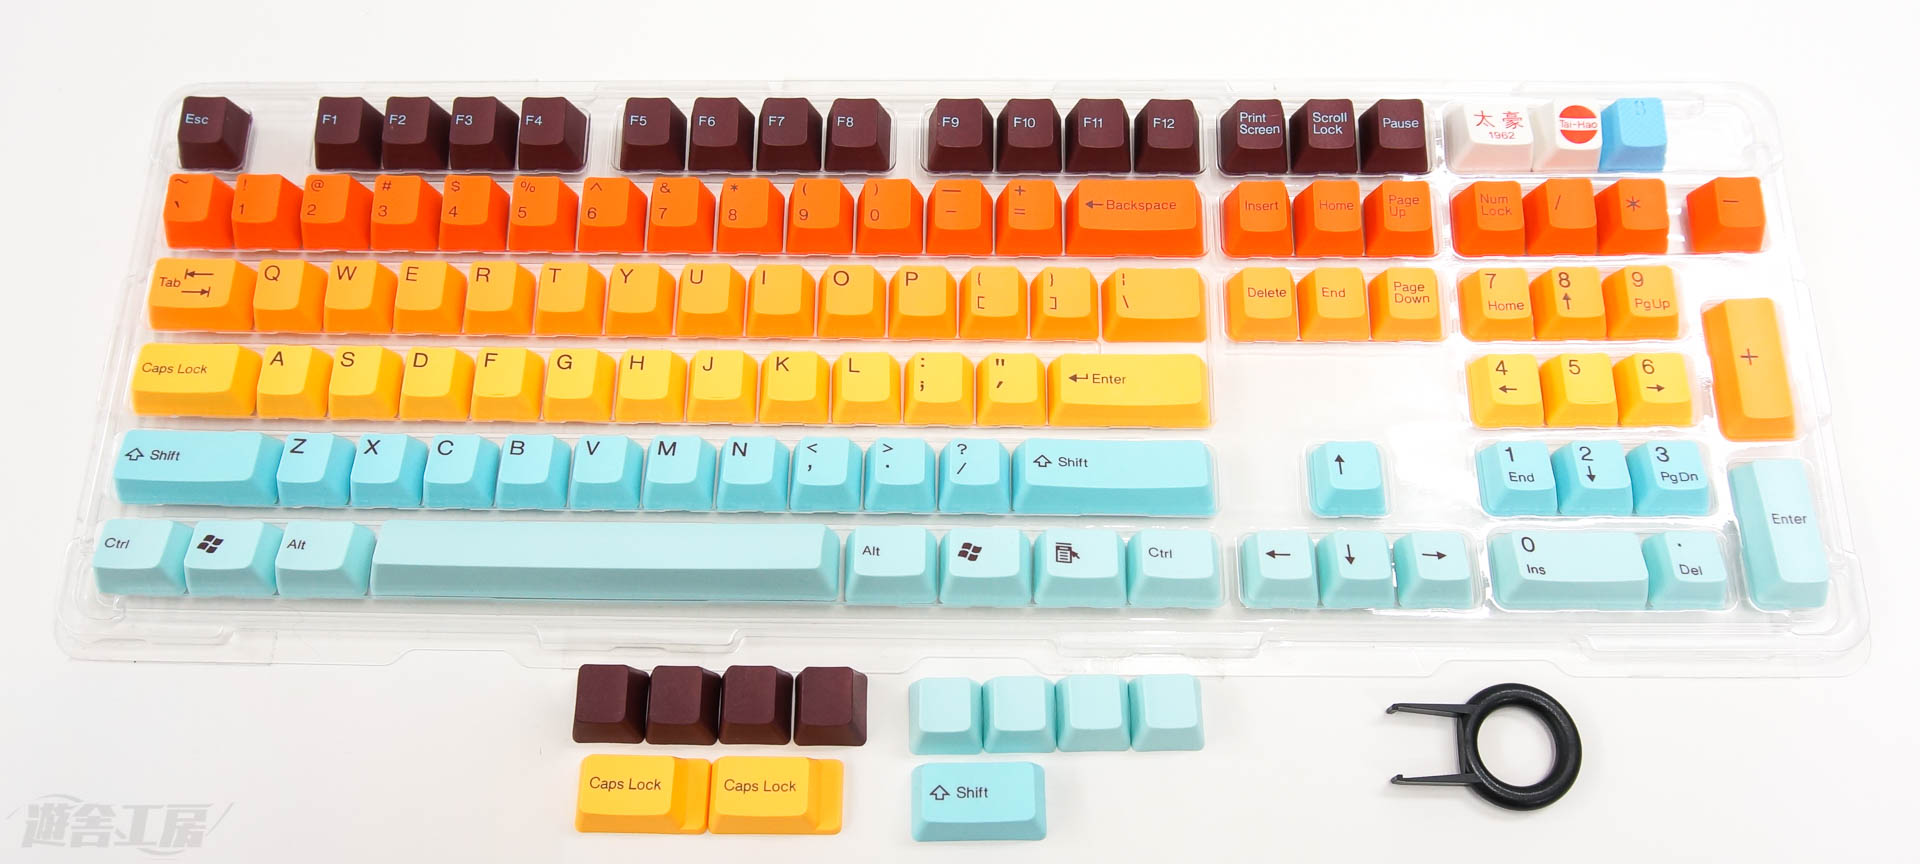
Keyboard caps
For this build I chose Tai-Hao PBT Hawaii keycap set which I bought at Yusha Kobo.
 (Image credit Yusha Kobo)
Before you get started
* Solder your microcontroller LAST! *
If you’re stupid like me you might solder your microcontroller on before your key switches. Don’t be stupid like me.
Once you solder on the microcontroller you can no longer solder any key switches above it. This may not be true for most kits but this was the case for the Mint60 kit I bought 🤦
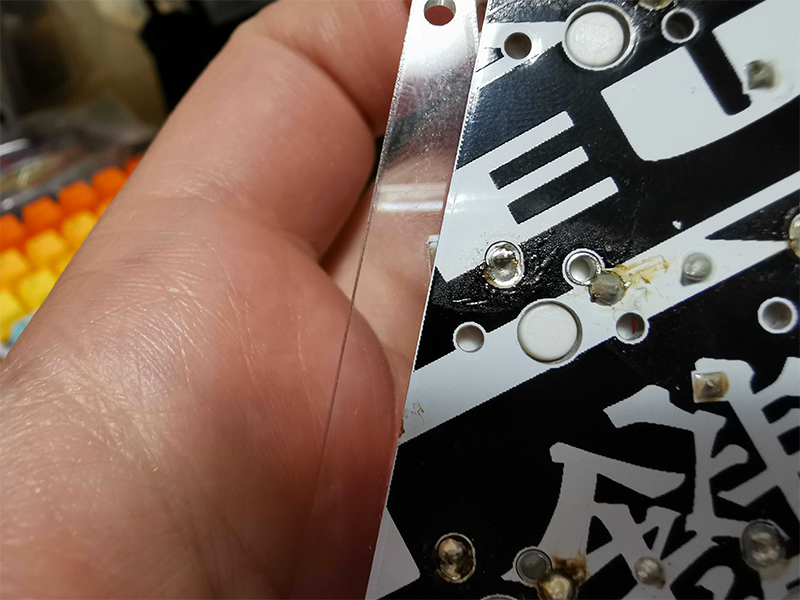
* Make sure your switches are soldered in completely *
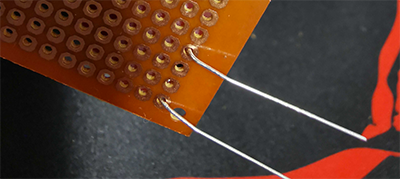
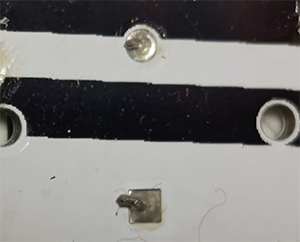
When I put everything together and plugged the keyboard in I noticed some keys didn’t work. Taking a closer look you can see a small gap in the pin hole which holds the key switch.
When soldering you should always make sure to cover pin holes completely in solder otherwise they can spring loose which is what happened here.
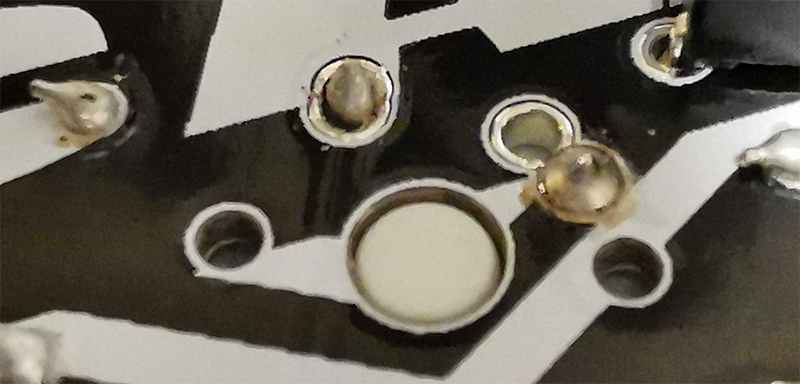
When soldering you want to make sure you cover each pin hole completely in solder and have a nice cone shape like the pin on the right in the above photo.
Getting started
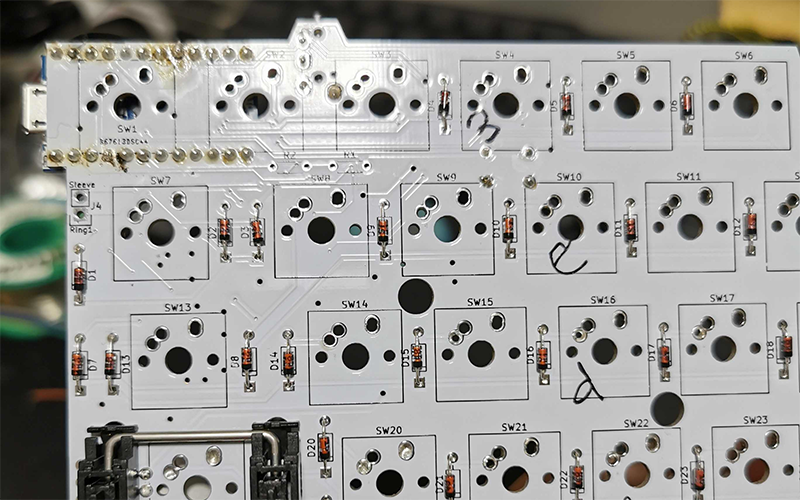
The first thing is soldering in resistors. If your PCB does not have these soldered in already you will have to manually do this. Resistors are needed to prevent voltage from fluctuating and randomly triggering key presses. More on why resitors are needed here .
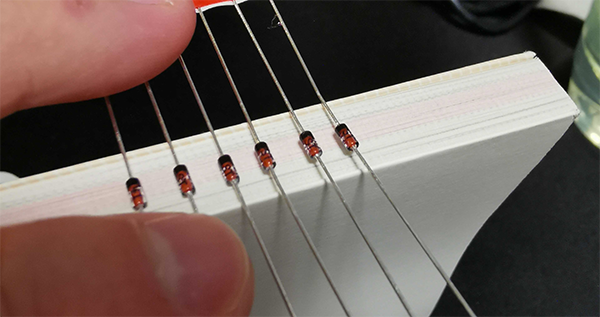
I pain-stakingly bent each individual resistor to fit it into the board. A quick trick that will save you time is to find a book or edge and bend all the resistors at the same time. This will ensure you can quickly slide all the resisters into the pin holes on your board.
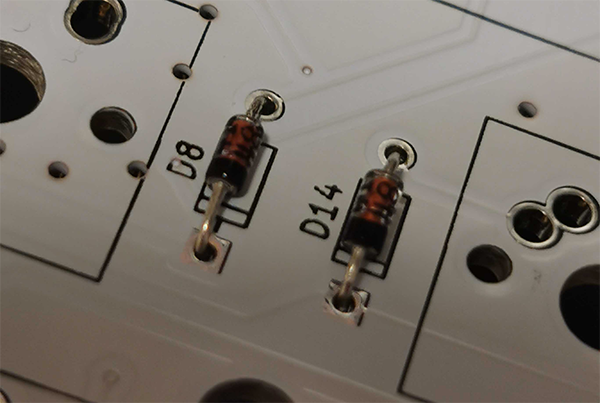
Once you slide in the resistors into the board, bend the bottoms so they don’t fall out
Afterwards solder the pin hole down and cut off the excess legging with wire cutters
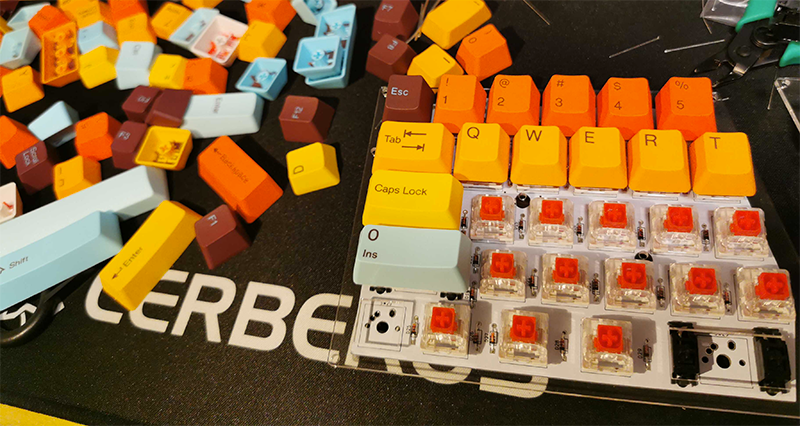
Soldering on the key switches
Your kit should come with a plate where you can start mounting your switches to your board.
Be careful at this step. Once you’ve decided on a layout you won’t be able to easily de-solder the key switches again. It’s possible, but will suck.
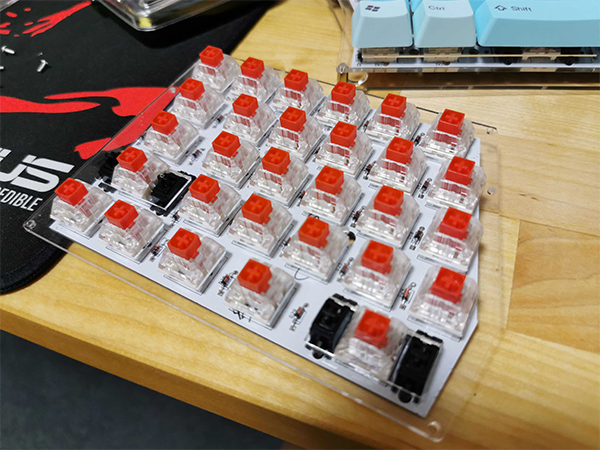
Note, the black areas surrounding the larger keys are called stablisers . These ensure longer keys like spacebar or backspace don’t fly off when pressed on the side. These are held in place through small holes in the PCB. At least, this was the case on my board.
Once you have decided on your choice of layout and swtiches you can start soldering the key switches onto the board. Also make sure the small white circle on the back of your key switch is flush against the backside of the PCB. I recommend using small clamps to hold the board in place before soldering.
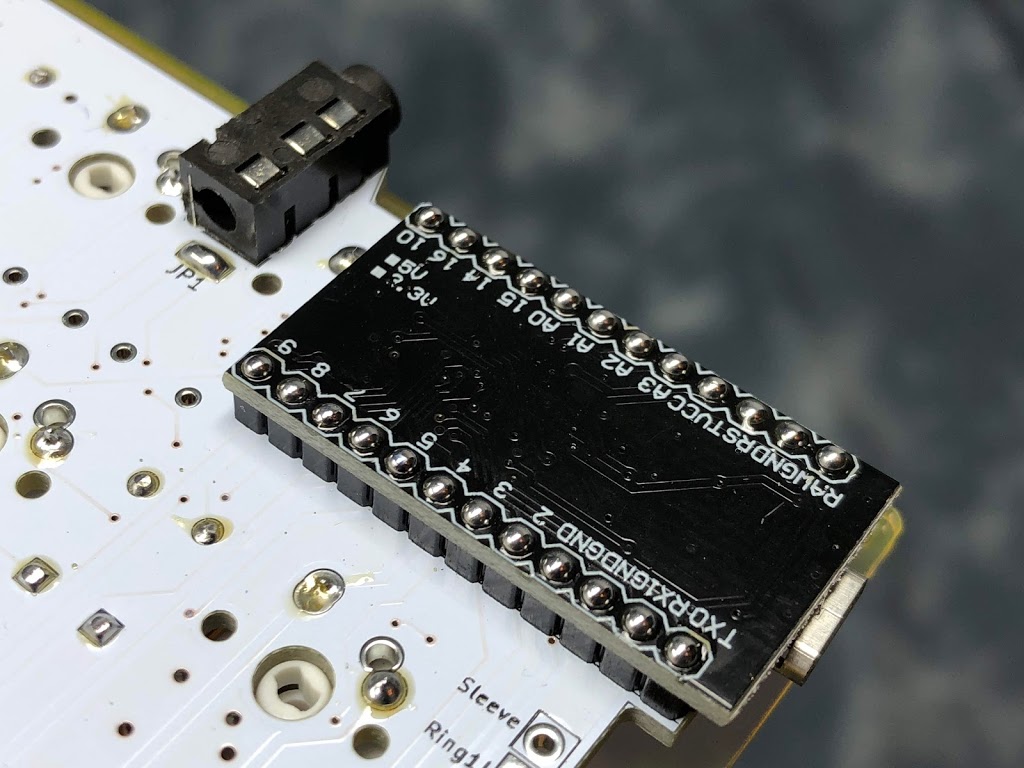
Flash your microcontroller
Your kit should come with a microcontroller. The most popular microcontroller for keyboards looks like the Arduino Pro Micro .
I went a bit crazy when I built my first kit. I had soldered everything onto the board and plugged it in. Nothing. Keys were not registered. No LED lights. This is because most kits dont flash the microcontroller. You will need to flash the firmware onto the microcontroller otherwise nothing will work.
I used QMK for flashing my microcontroller. This is a free open source project for hardware keyboards. Flashing the microcontroller is easy using QMK. You just plug it into USB and run the QMK software and select your keyboard model. Most hobby boards have their software already included in the QMK repository so flashing is easy.
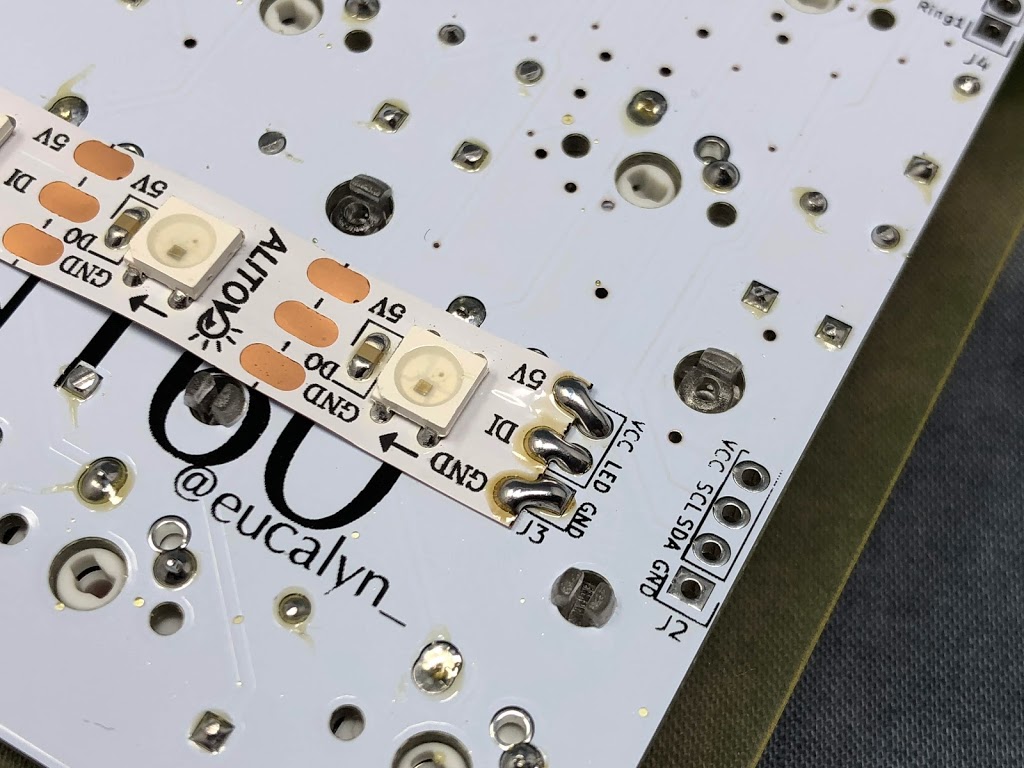
Soldering on the remaining components
After you made sure your microcontroller can be flashed its time to solder the rest of the components down. For me, this meant the TRRS audio jack for my split keyboard, a microcontroller, and a small RGB LED strip
 (image credit to
eucalyn’s
Mint60 guide)
(image credit to
eucalyn’s
Mint60 guide)
Make sure your key switches work
Once your microcontroller has been flashed and soldered you can start testing each key switch. This is good idea before closing the keyboard up. If one key does not respond it may need to be resoldered. I had several switches which needed to be resoldered on my first build because I didn’t use enough solder.
After that you need some software for testing. If you are on OSX I recommend using Karabiner EventViewer . Once installed you can check each individual key and make sure it maps to the correct key. A word of warning though the “fn” key will not register unless you press it in combination with another key.
Put on your key caps!
Almost there! Once you’ve verified your board works you can start putting the key caps on it!
Customization keymaps
After you get your board setup you will want to start customizing the layout a bit. This is pretty simple once you can get QMK compiling locally. After you can compile the project you can simply modify the keymap inside QMK. I ended up modifying my original keymap with my own mappings.
I would defintely recommend reading the noob guide to QMK before jumping in to get an idea of the full set of features: https://beta.docs.qmk.fm/newbs/newbs_getting_started
Conclusion
It turns out building a mechanical keyboard is actually not that difficult. I had a difficult time because I didn’t read my kits instructions and I paid for it with hours of de-soldering…
In the end, a keyboard is just a bunch of switches. The circuit is quite simple and easy to understand. It’s essentially a bunch of arduino buttons rigged together if you’ve every done anything with the Arduino it should be quite simple.
Eventually I want to design my own PCB layout. However, for the time being I’m quite happy with form factors most hobby kits offer :)